How-To
How to organize your Gmail inbox with folders and labels
Gmail users can improve their experience by organizing their inbox with folders and labels. Here’s how.
If you’re an avid Gmail user, you may have experienced moments of inbox overload. When you’ve got messages flying in from all directions, organizing your inbox can help.
Luckily, Gmail offers a useful labeling system you can use to maintain some level of order.
So, what’s a label? It’s basically a folder for your emails. If you’re super serious about organization, you can even automate the labeling process via filtering.
Are you ready to restore order to the chaos of your inbox? Let’s discuss how to create, apply, and automate labels in Gmail
How to create a folder or label in Gmail (web app)
You can create a label, which acts like a folder, in the Gmail web app by following these steps:
-
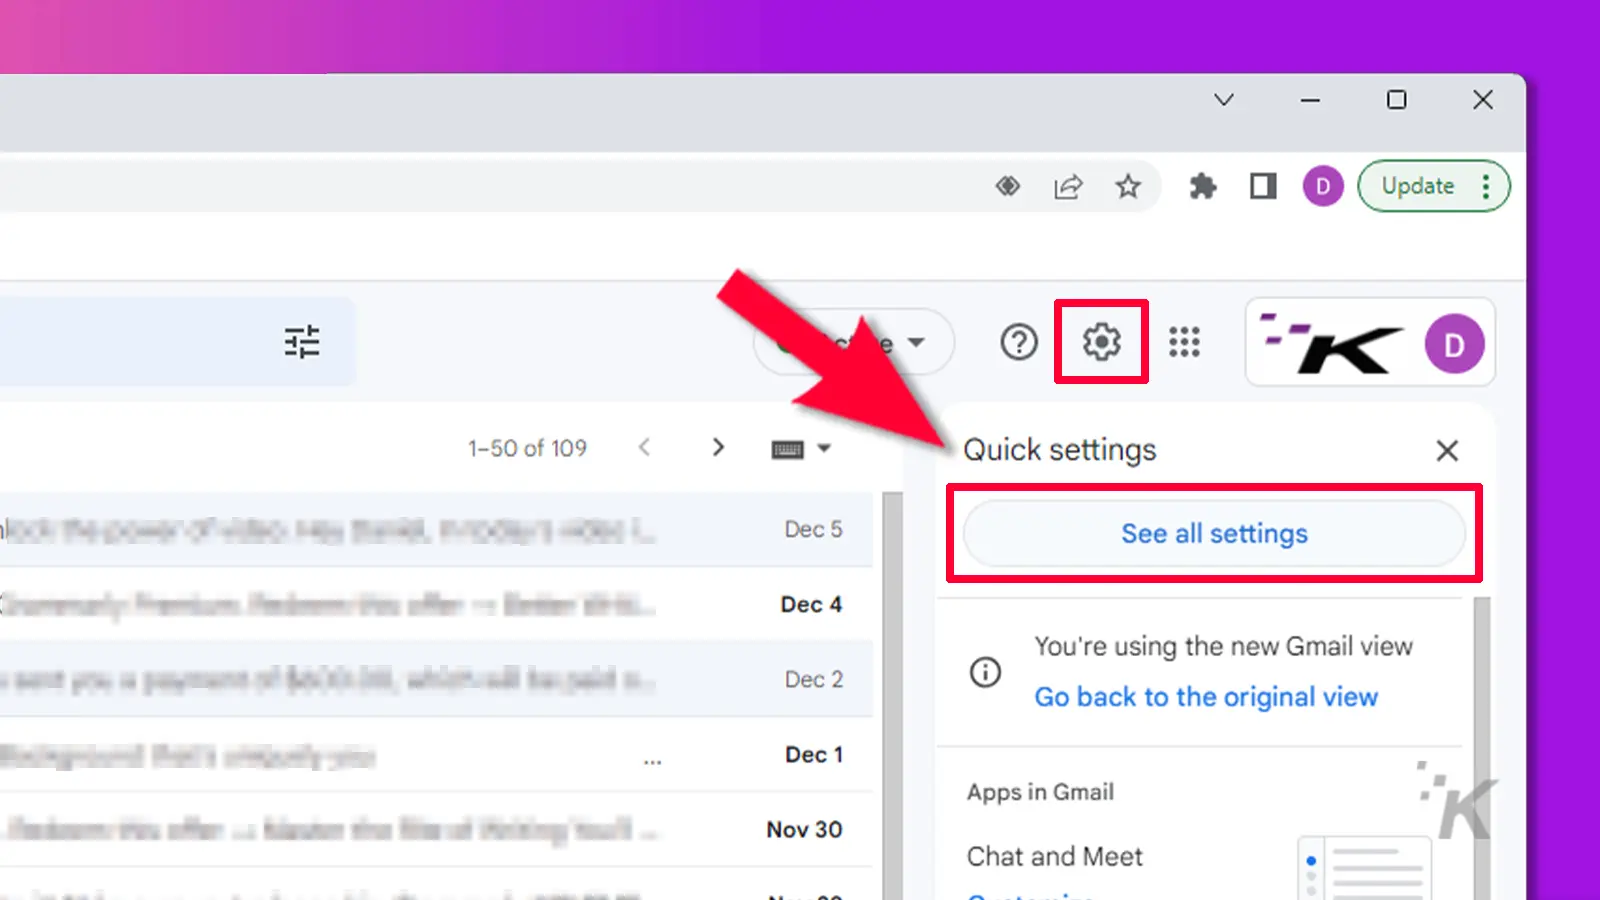
Click the Settings icon in the top right corner and select See all settings

-
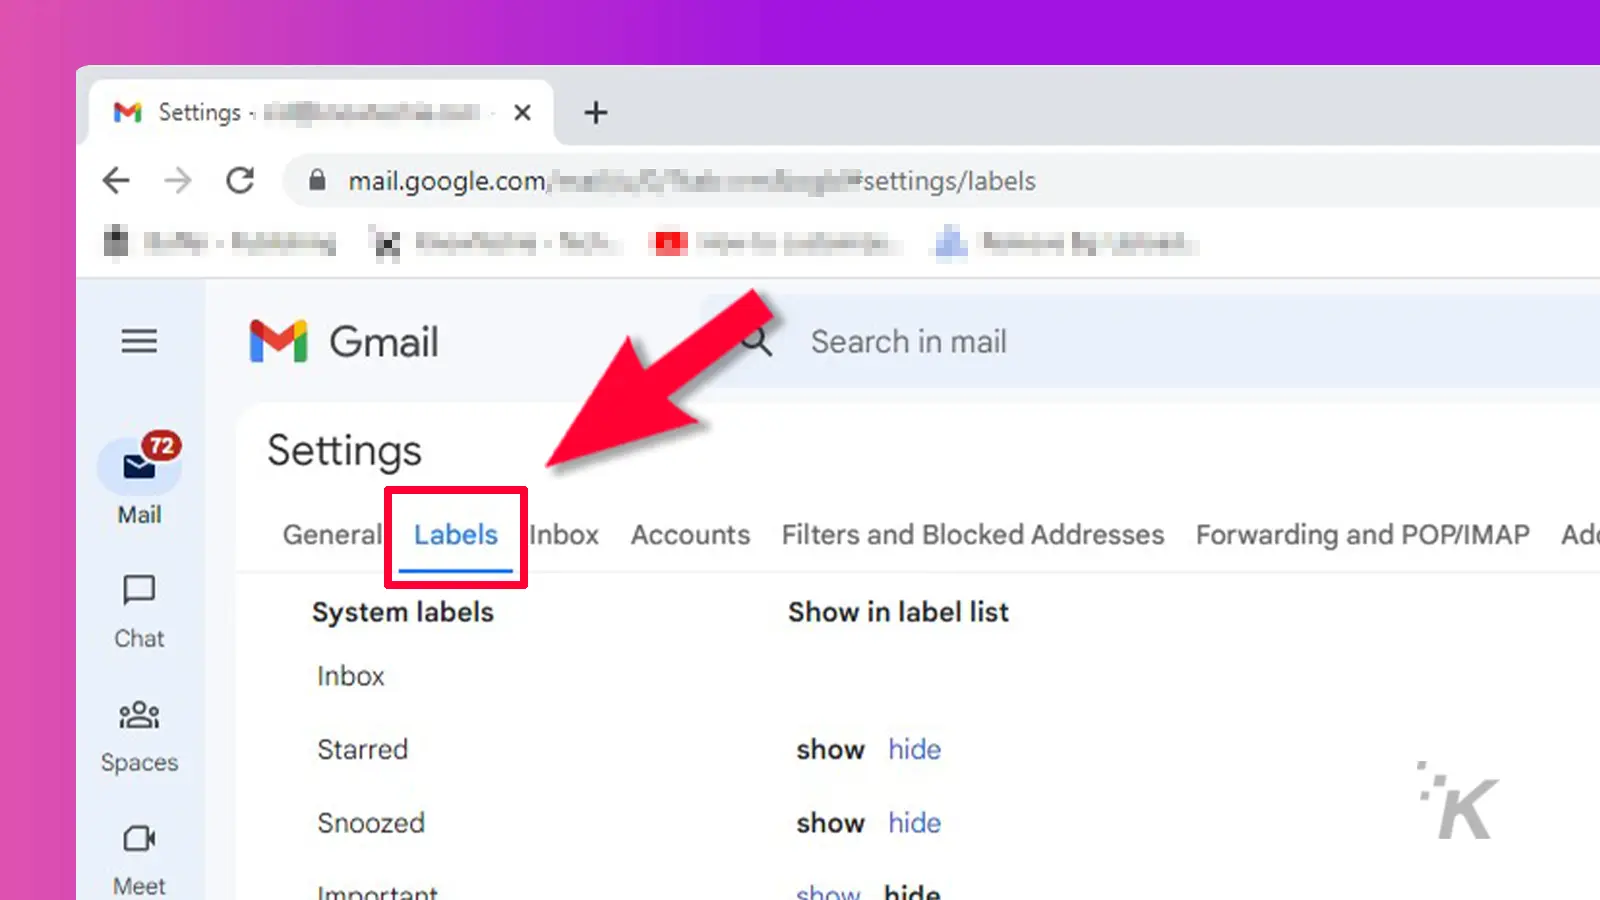
Select the Labels tab
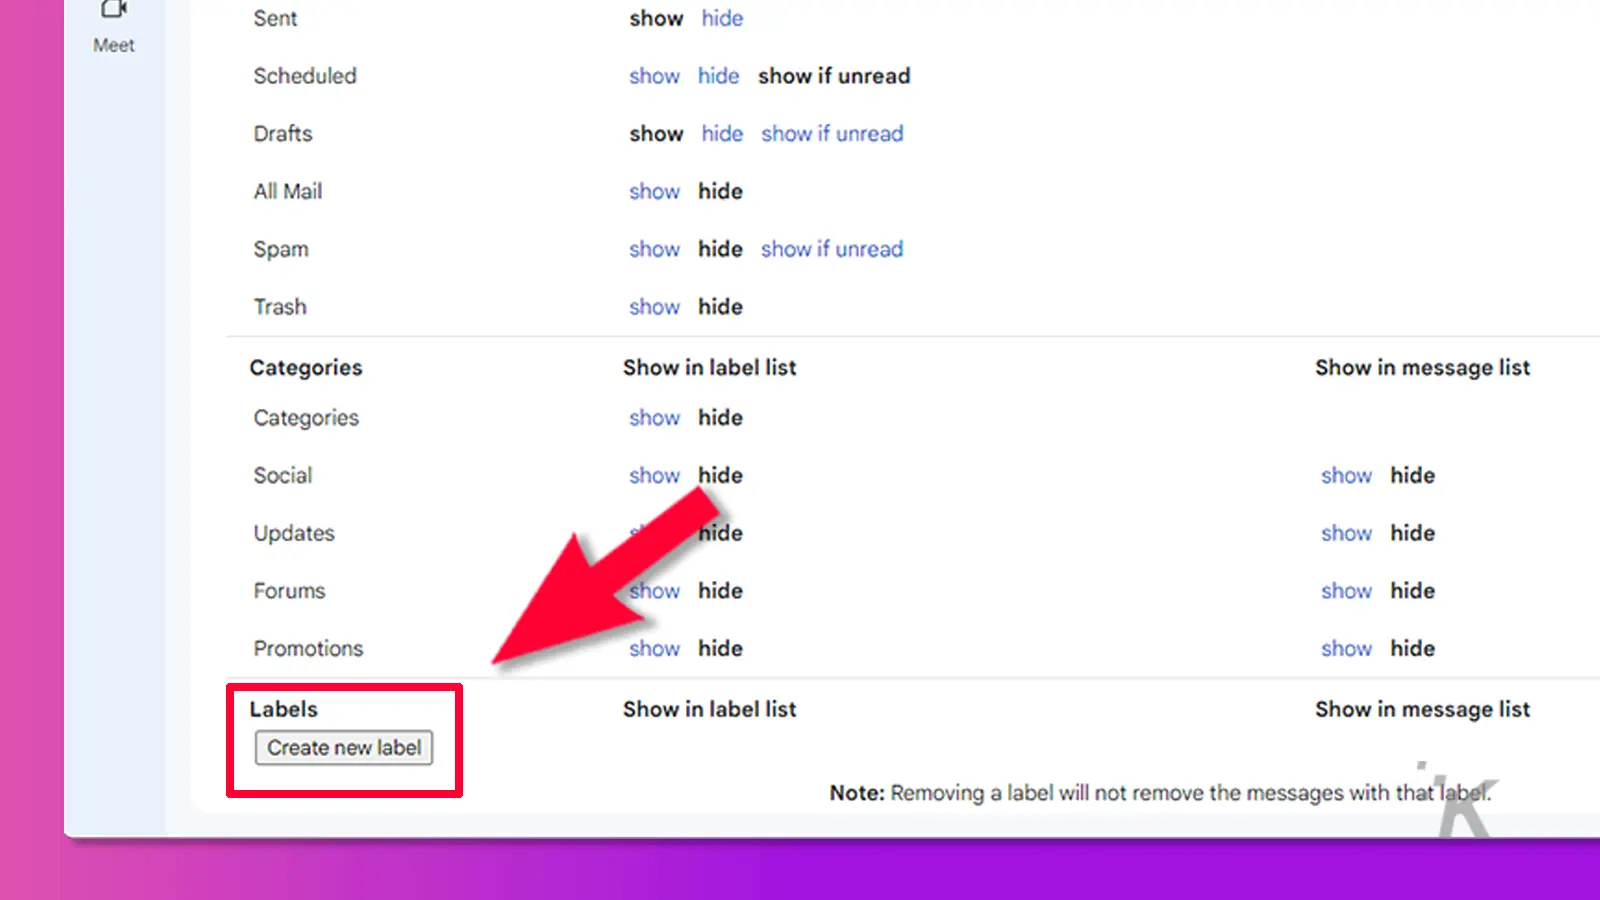
-
Scroll down to the Labels section and click Create new label
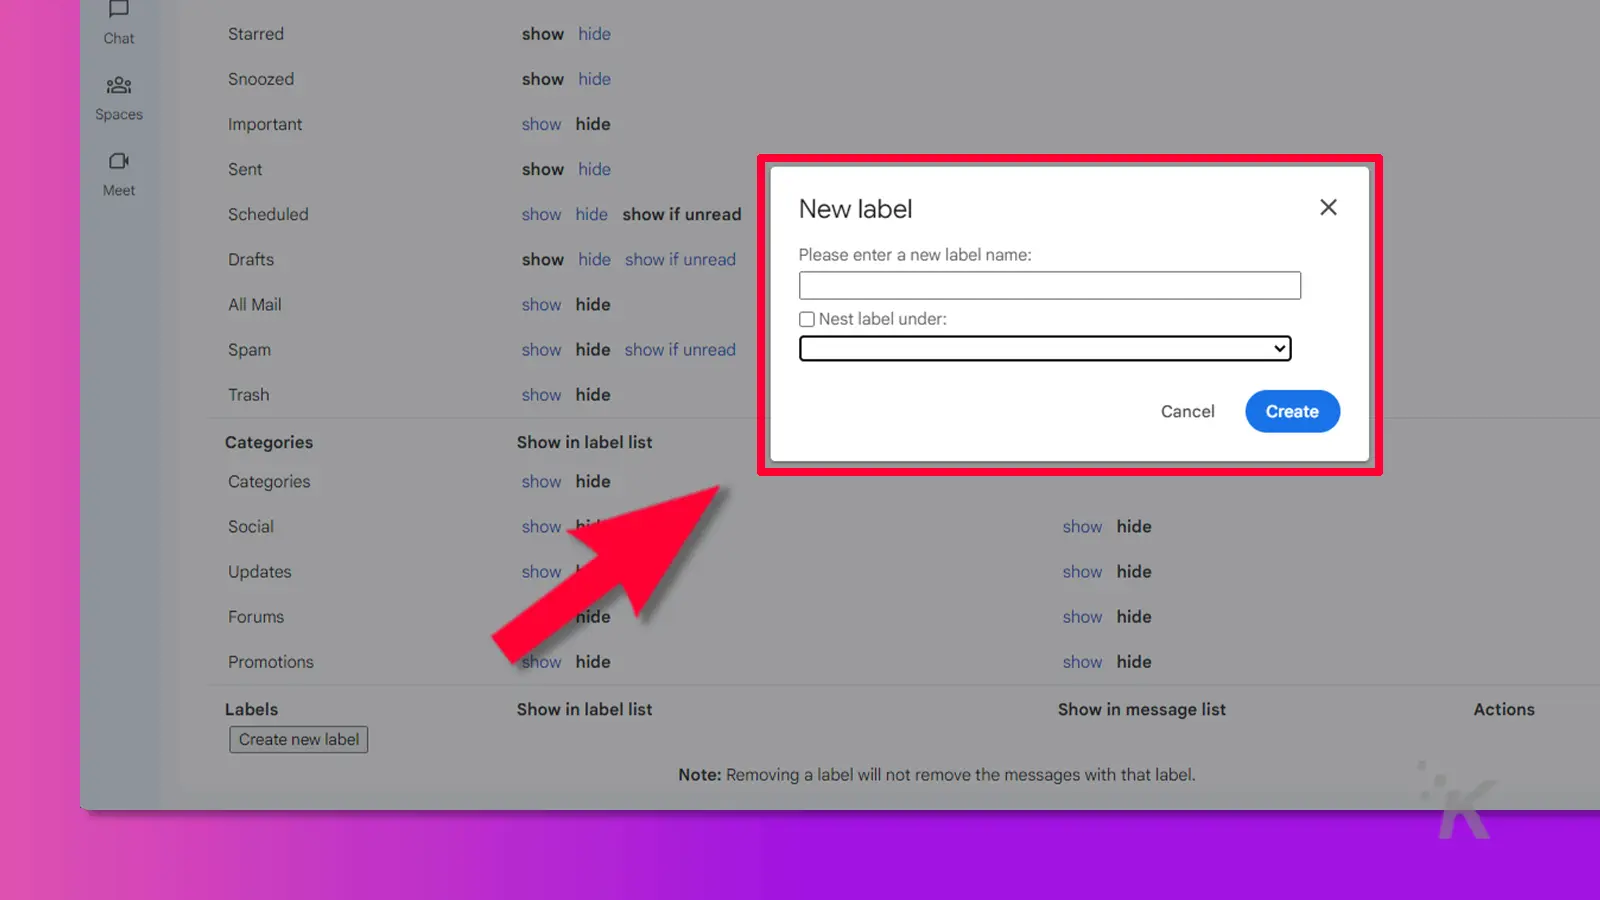
-
Name your label and click Create. If appropriate, you can choose to nest your new label under a parent label that already exists
Your new label should now be available for use in your mailboxes.
If you need to modify your label at any time, you can click the remove or edit buttons in the label settings, depending on the action you want to take.
How to create a folder or label in Gmail (mobile app)
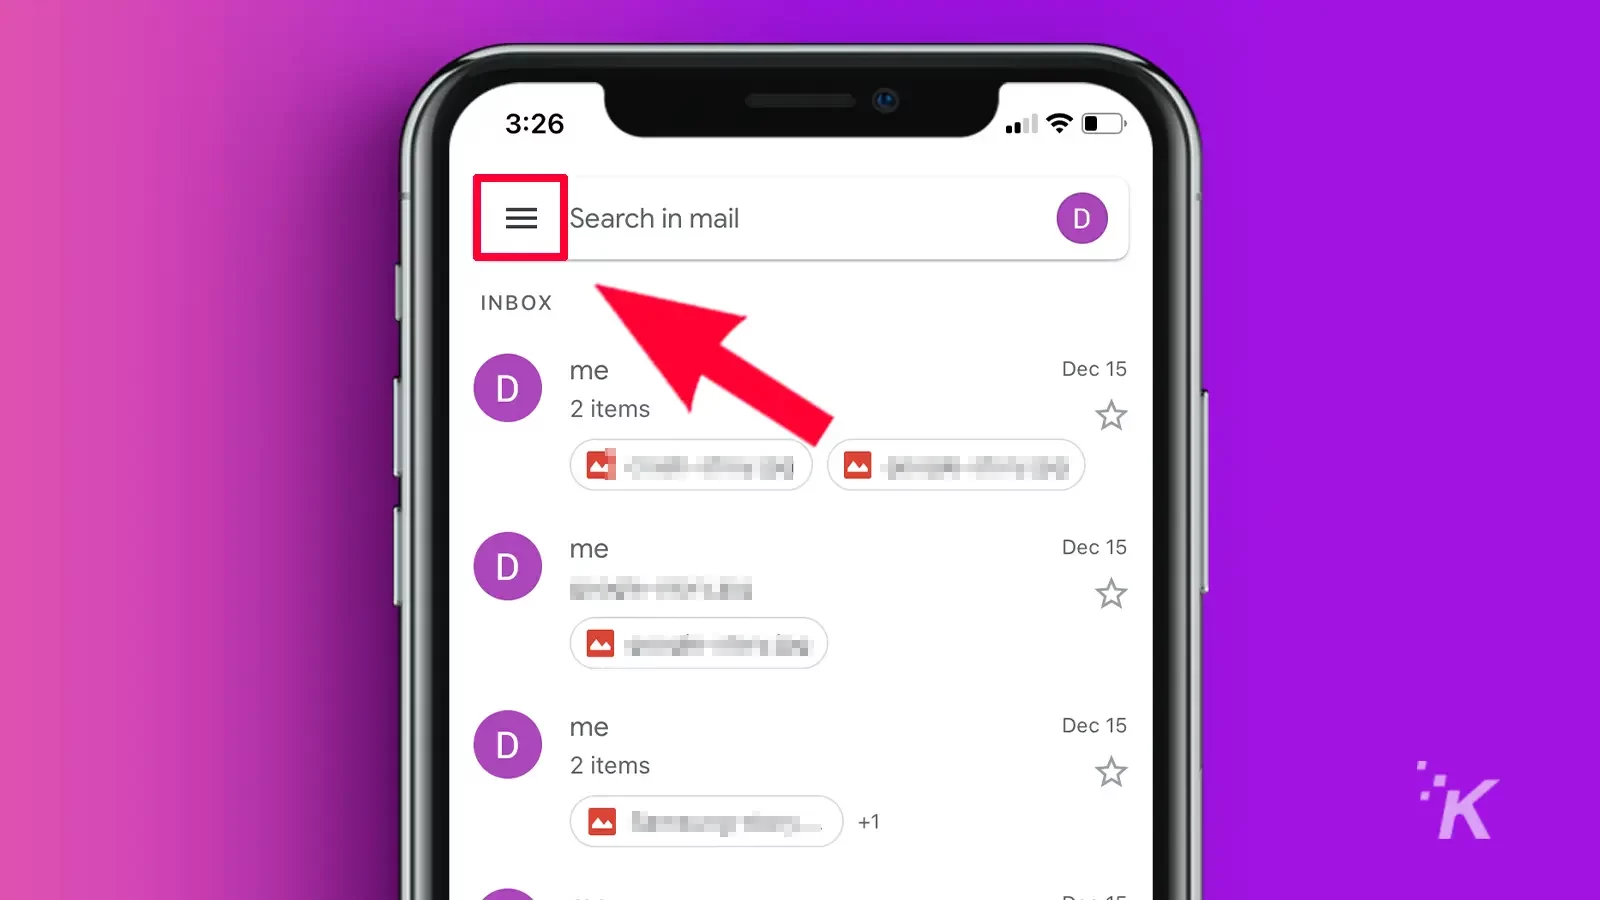
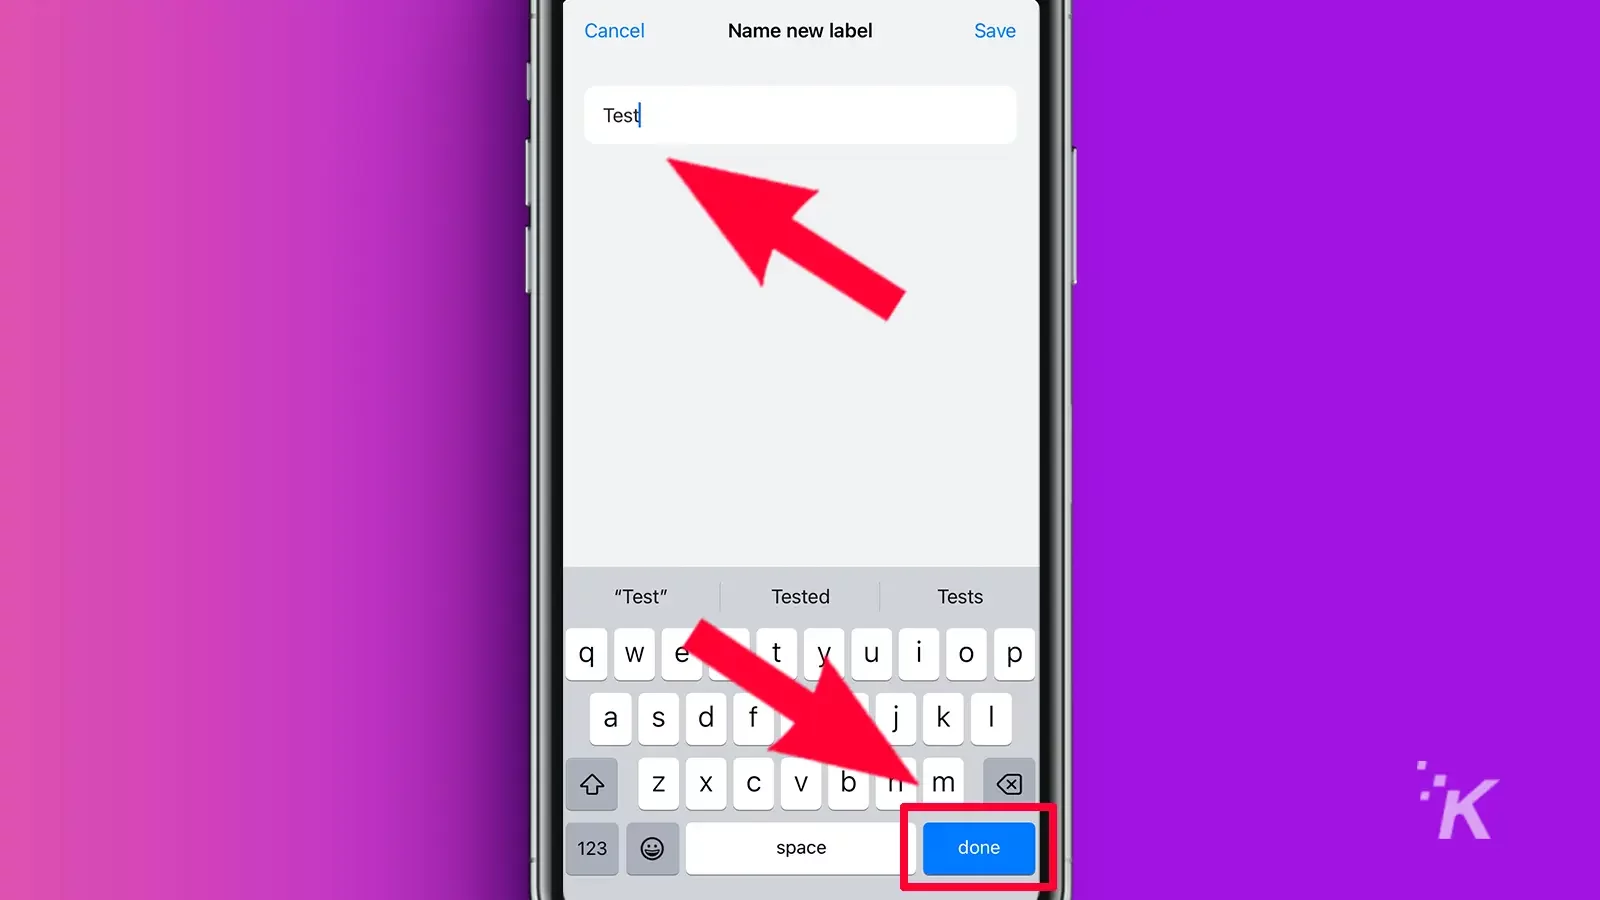
If you’re using the Gmail mobile app for iOS, you can create a label by following these steps:
- Tap the More (hamburger) button
- Scroll down to the Labels section and tap Create new
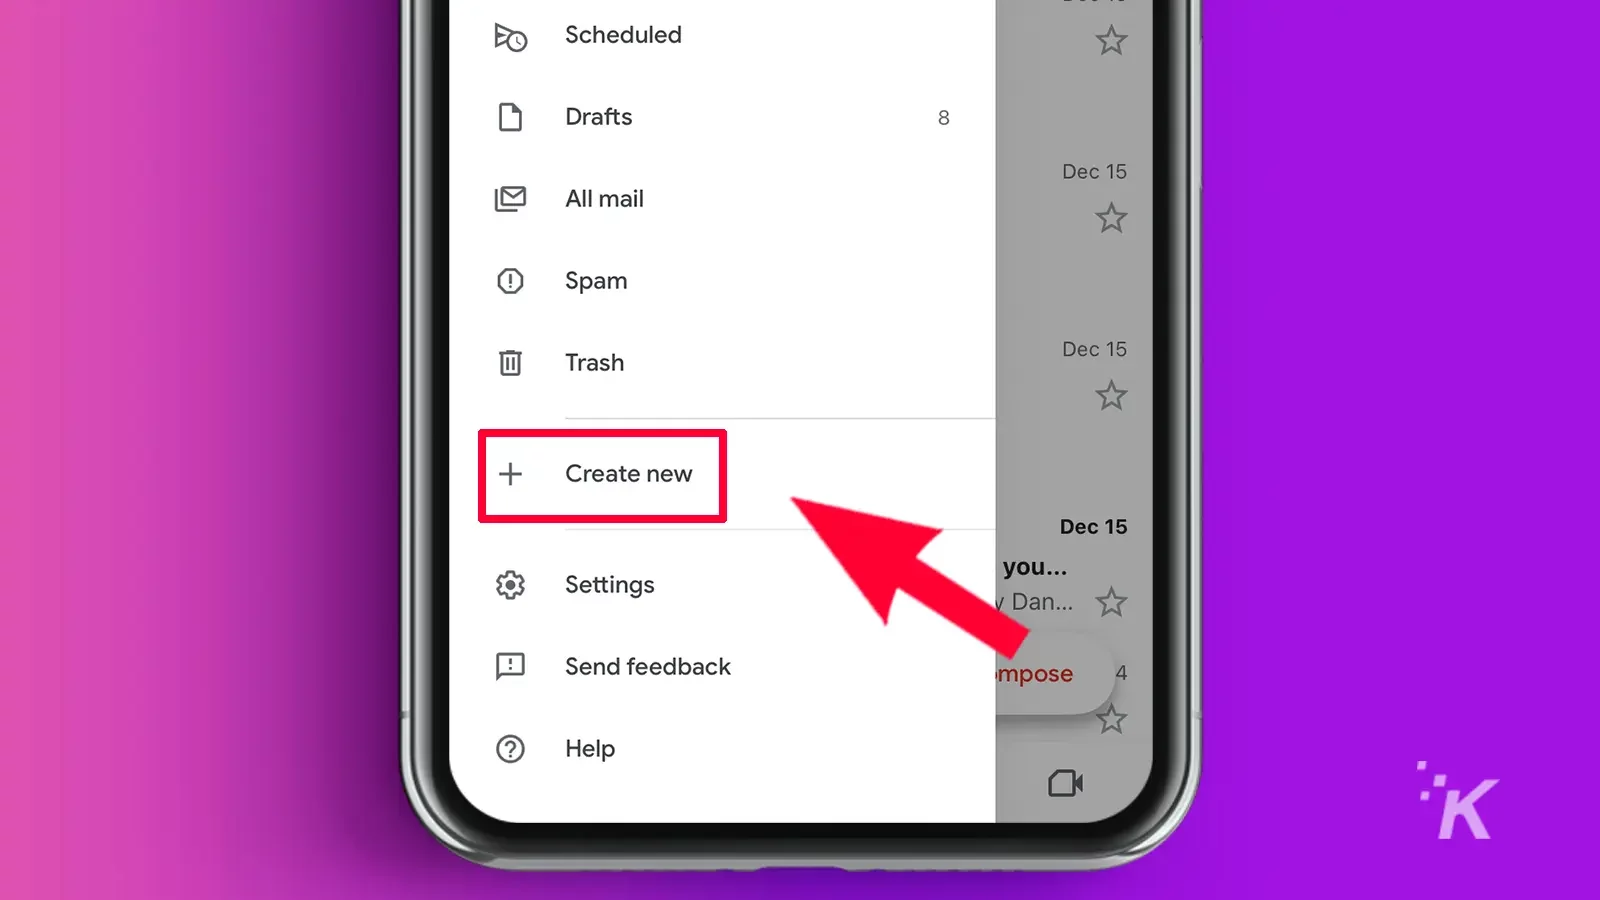
- Name your label and tap Done
If you need to edit or delete a label on your iOS device, you can do so within Settings (accessible from the Hamburger menu).
From here, you’ll need to go to Inbox customizations → Inbox customizations → Labels and select the label you want to modify.
Unfortunately, Gmail for Android doesn’t allow you to create labels, so you’ll need to use the web app or an iOS device to do the job.
How to label emails in Gmail (web app)
If you’ve already got some labels ready to go, you can label emails in the Gmail web app by following these steps:
- Select an email and click the Labels icon
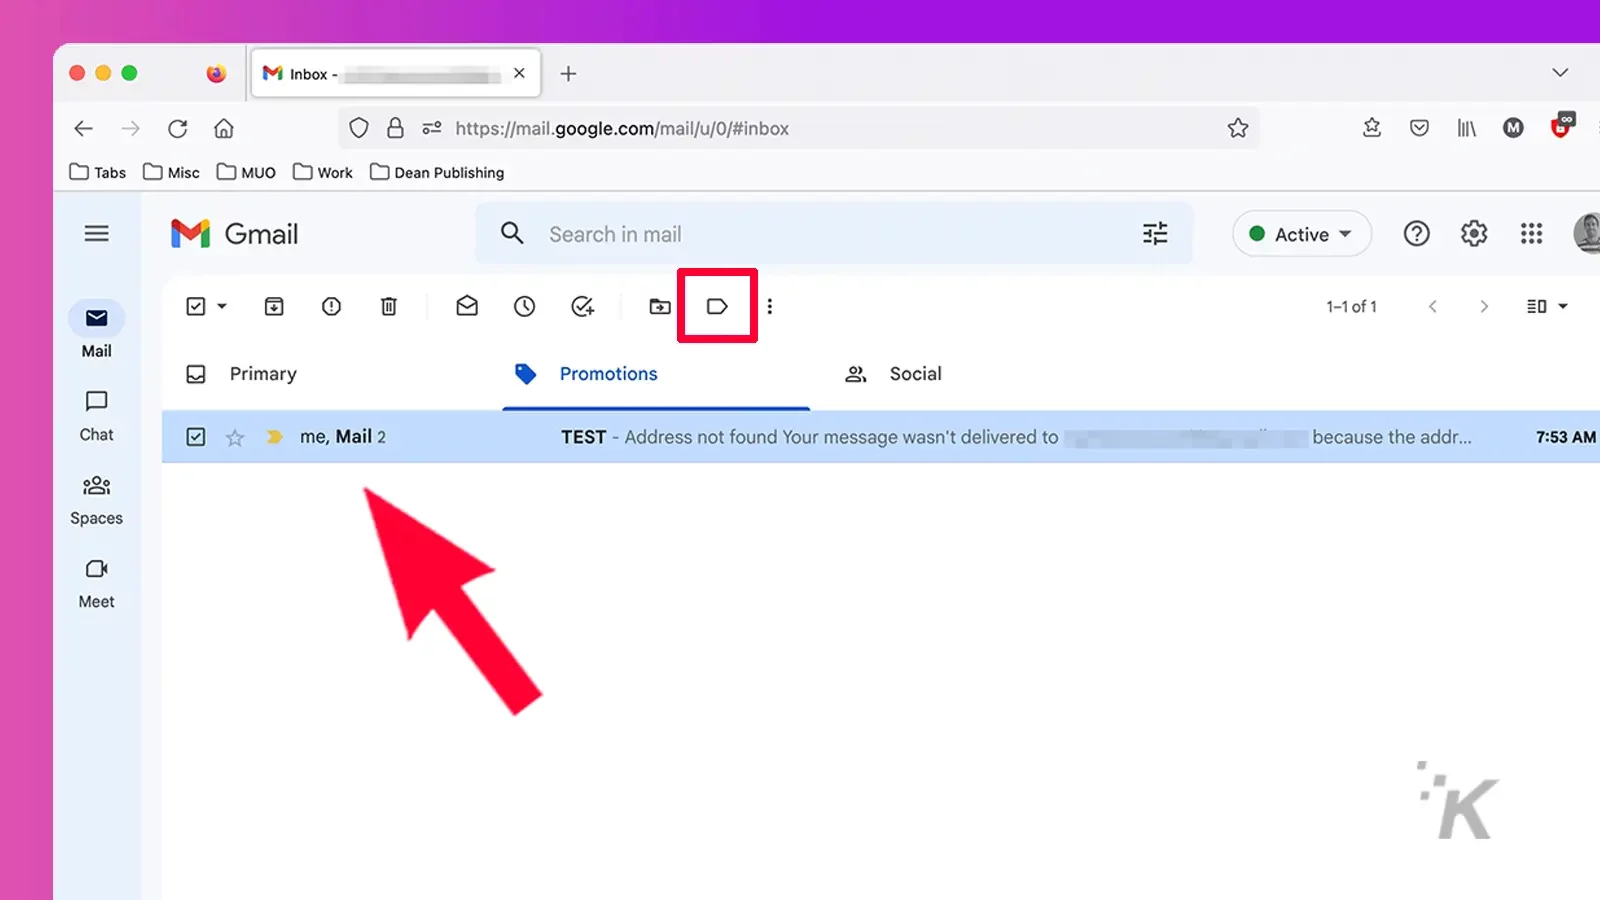
- Tick the label you want to use and click Apply
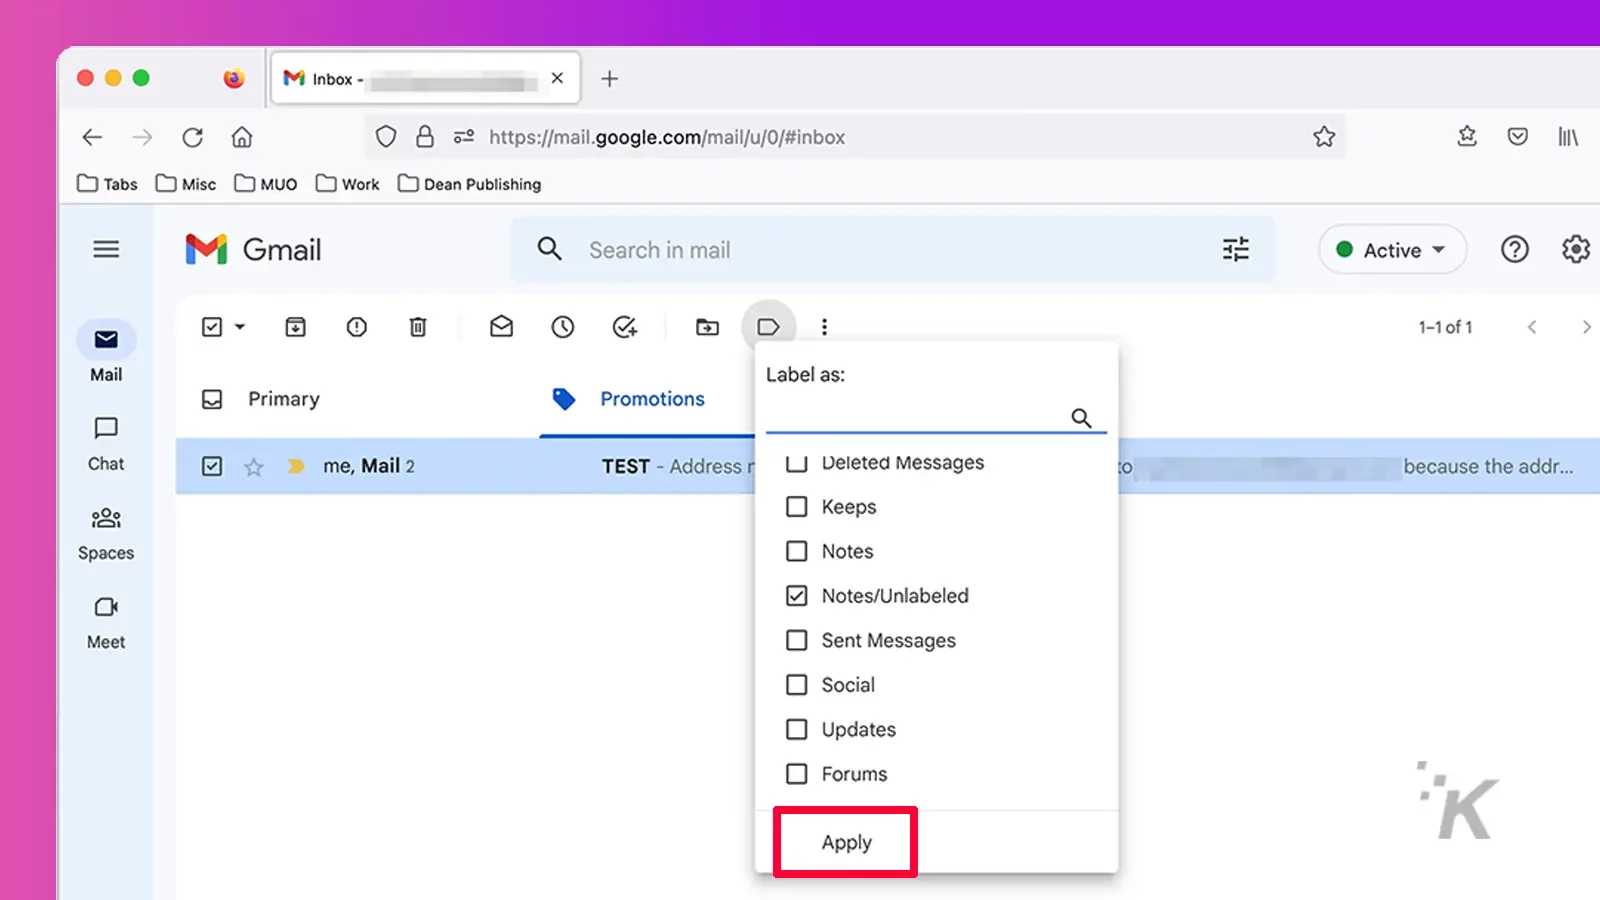
From the labels menu, you’ll also see Create new and Manage labels options, granting you quick and easy access to key settings.
How to label emails in Gmail (mobile app)
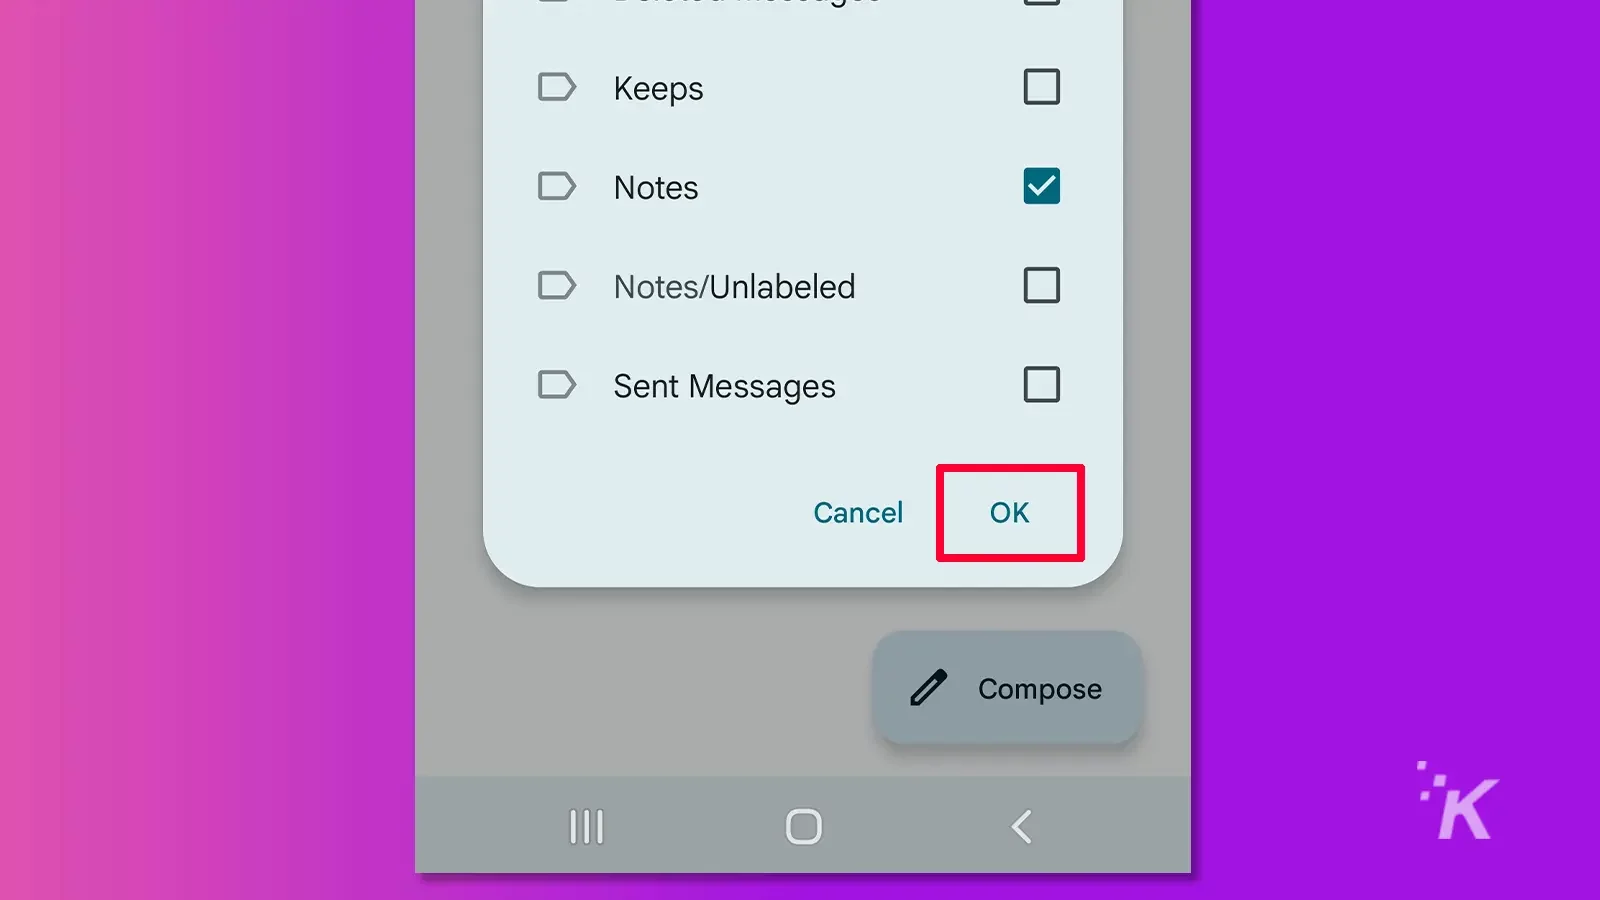
You can apply pre-created labels to emails in the Gmail mobile app by following these steps:
- On Android, long-press an email to select it. On iOS, tap the sender’s profile picture. If necessary, you can select multiple messages
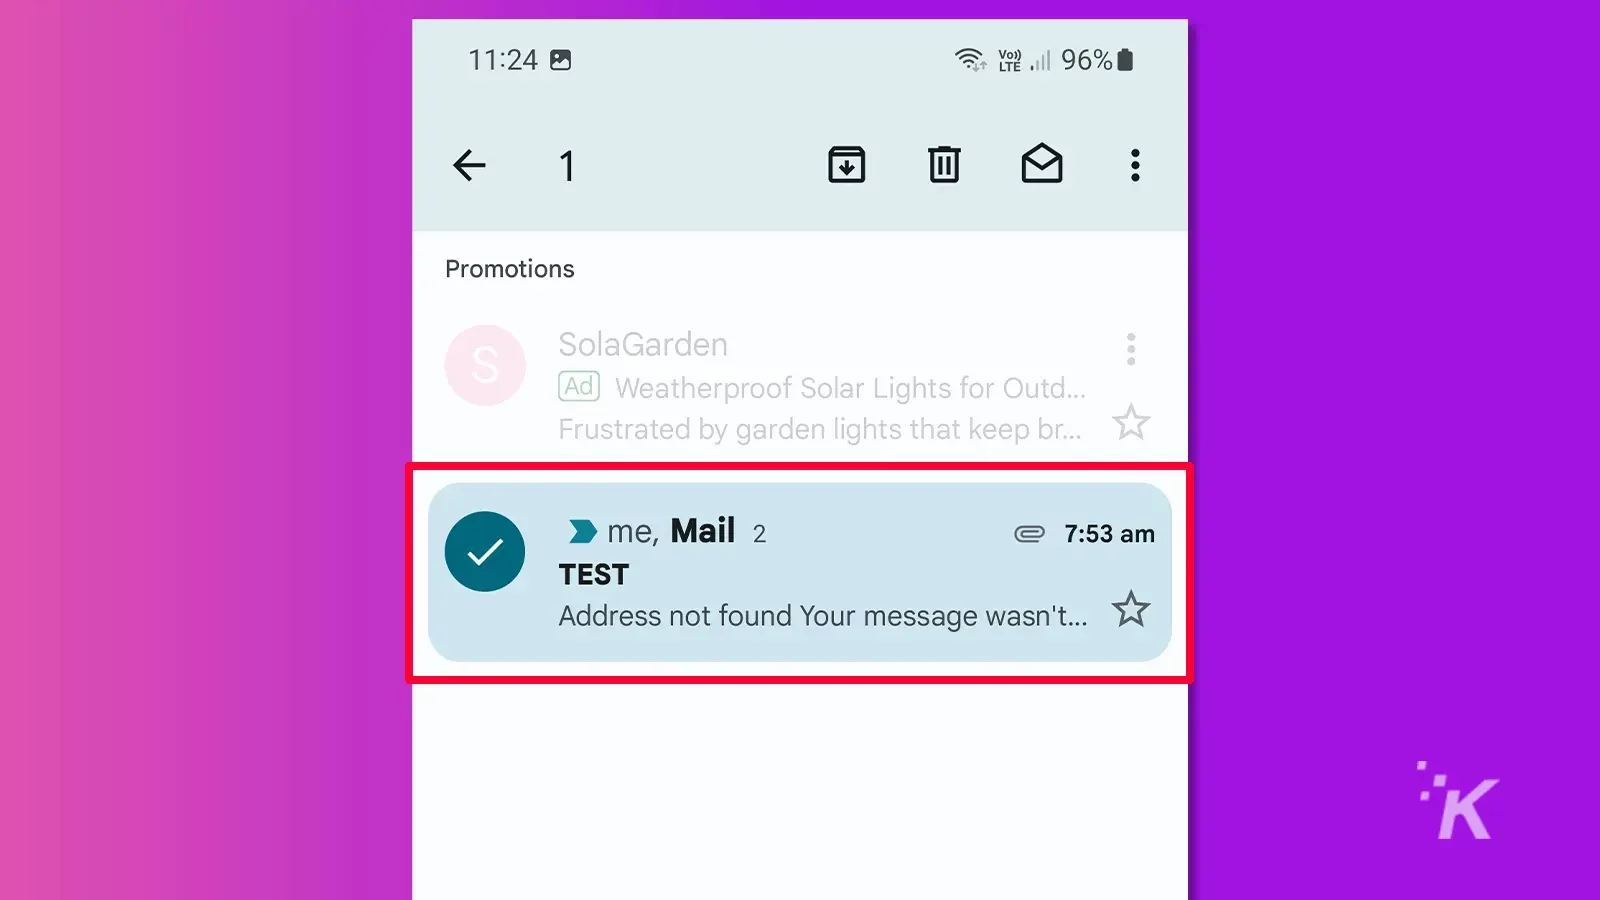
- Tap the More (three dots) button in the top right corner and select Change labels
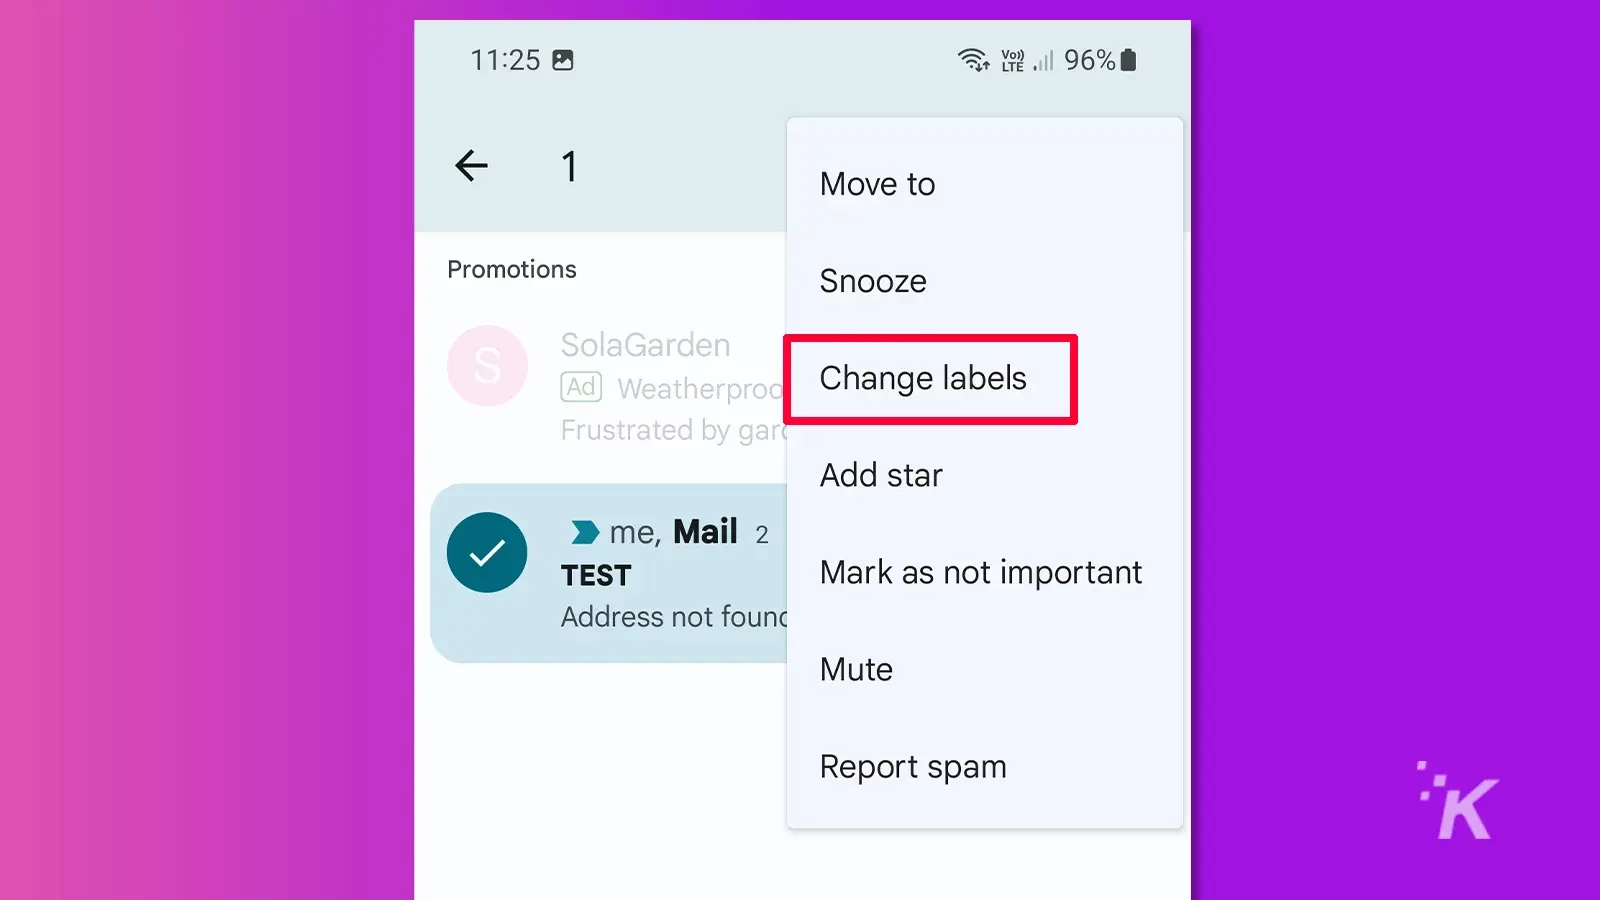
- Select one or more labels and tap OK (Android) or Apply (iOS)
Alternatively, you can open a singular email and follow the same process if you don’t want to work from your inbox.
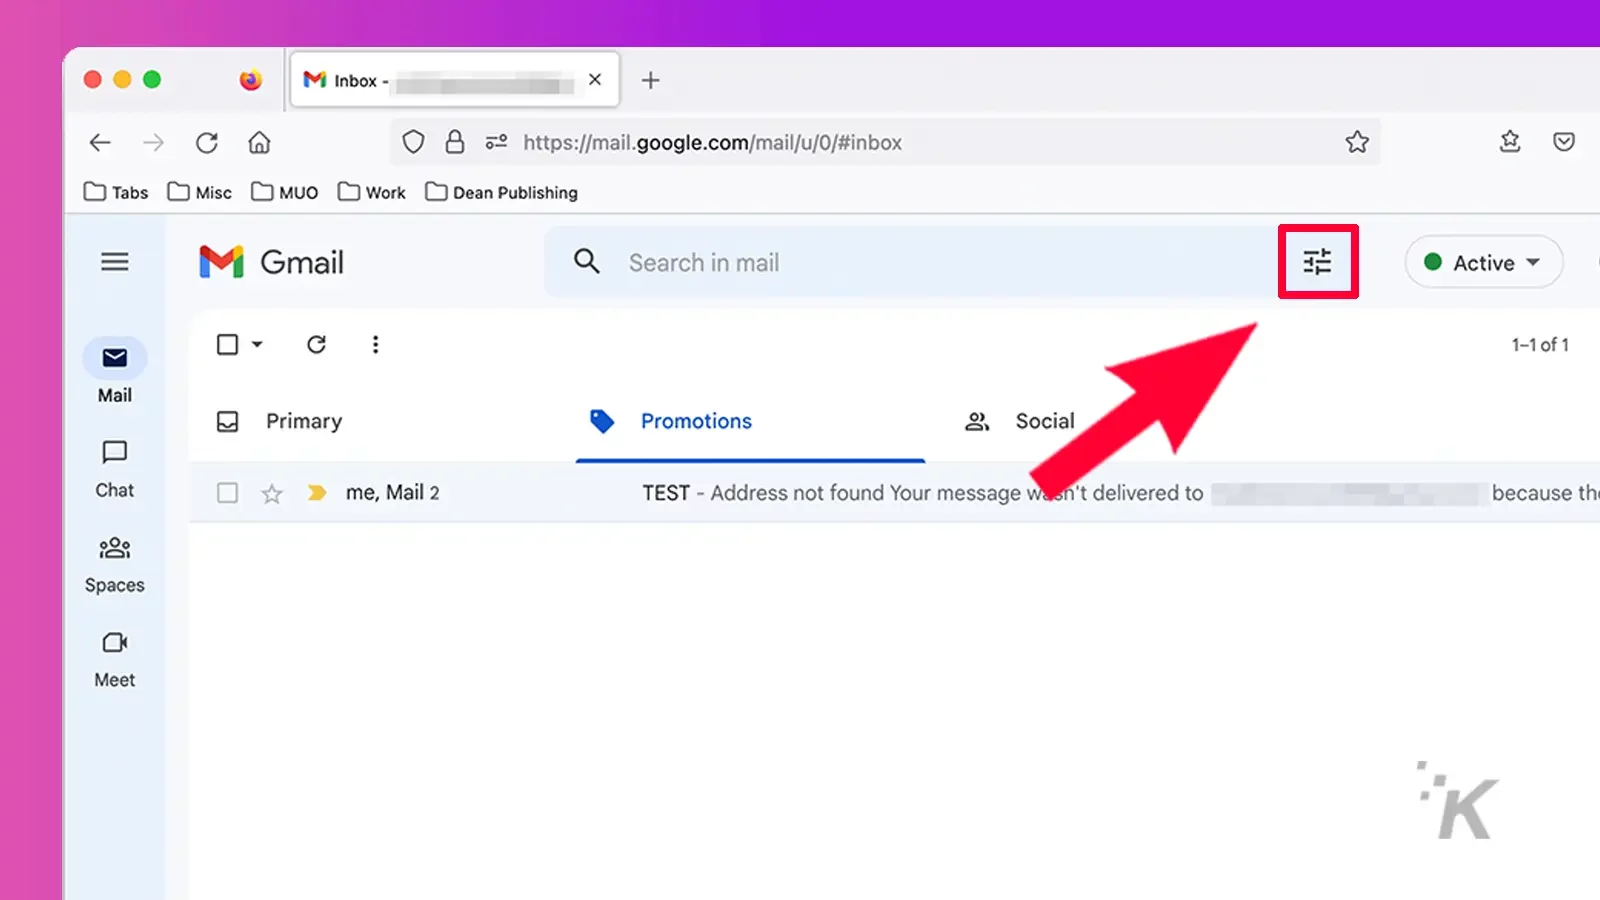
How to automatically apply labels in Gmail
When it comes to productivity, automation is key. If you don’t want to manually slap a label on every message, you can organize Gmail by using a filter to do the work for you.
Here’s how to automatically label emails in the Gmail web app:
- Click the Show search options button in the search bar
- Enter the appropriate variables and click Create filter
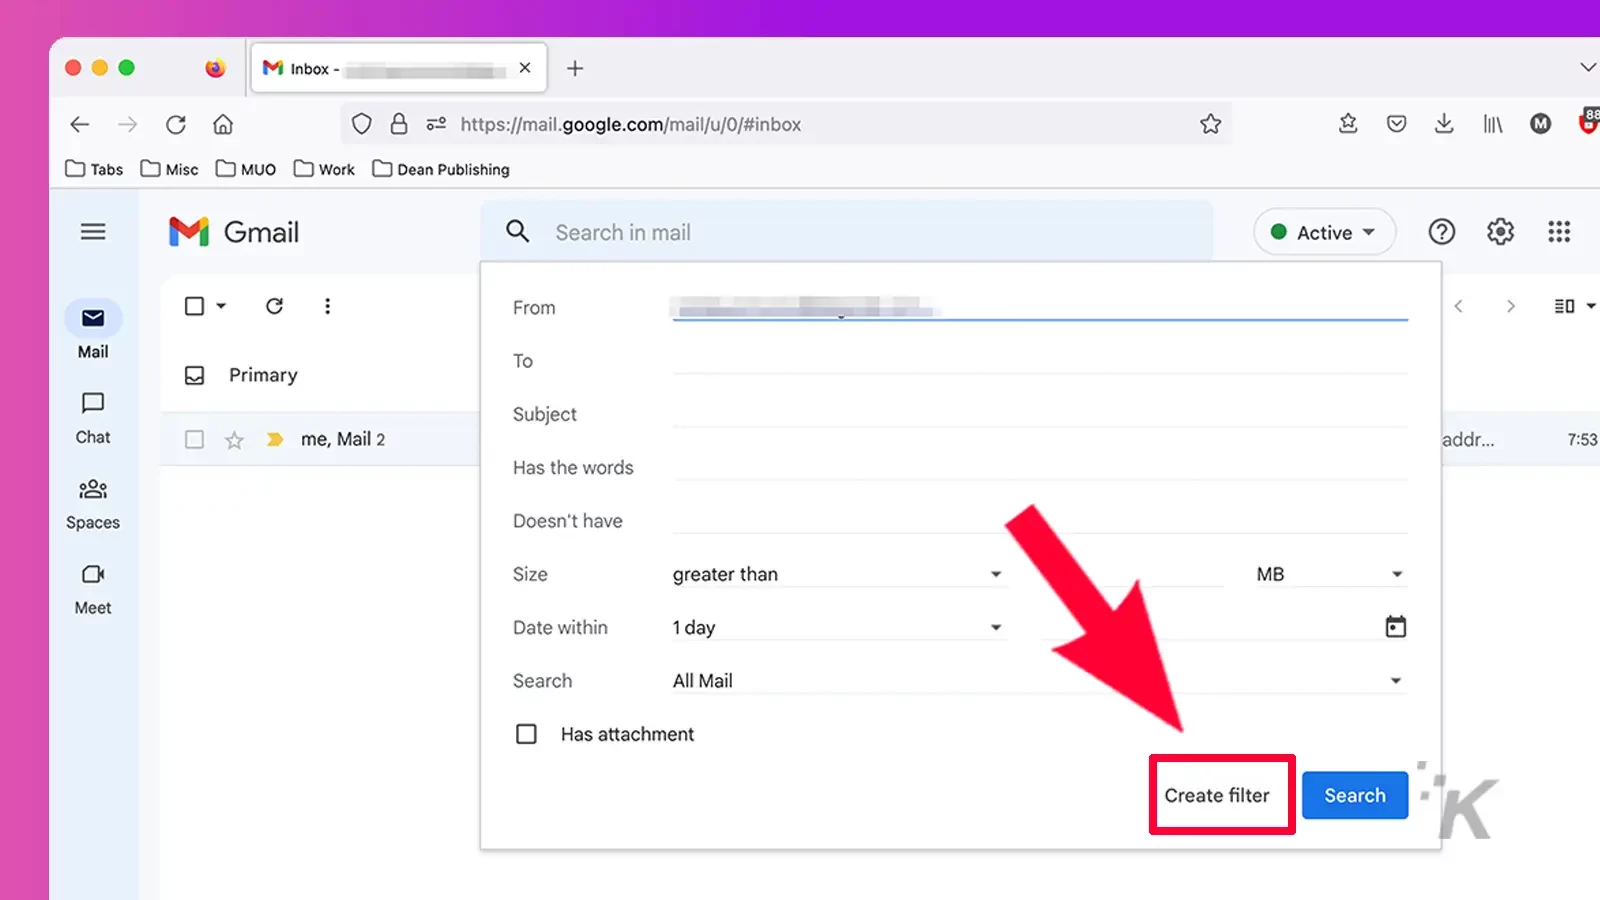
- Tick Apply the label, choose the appropriate label, and click Create filter
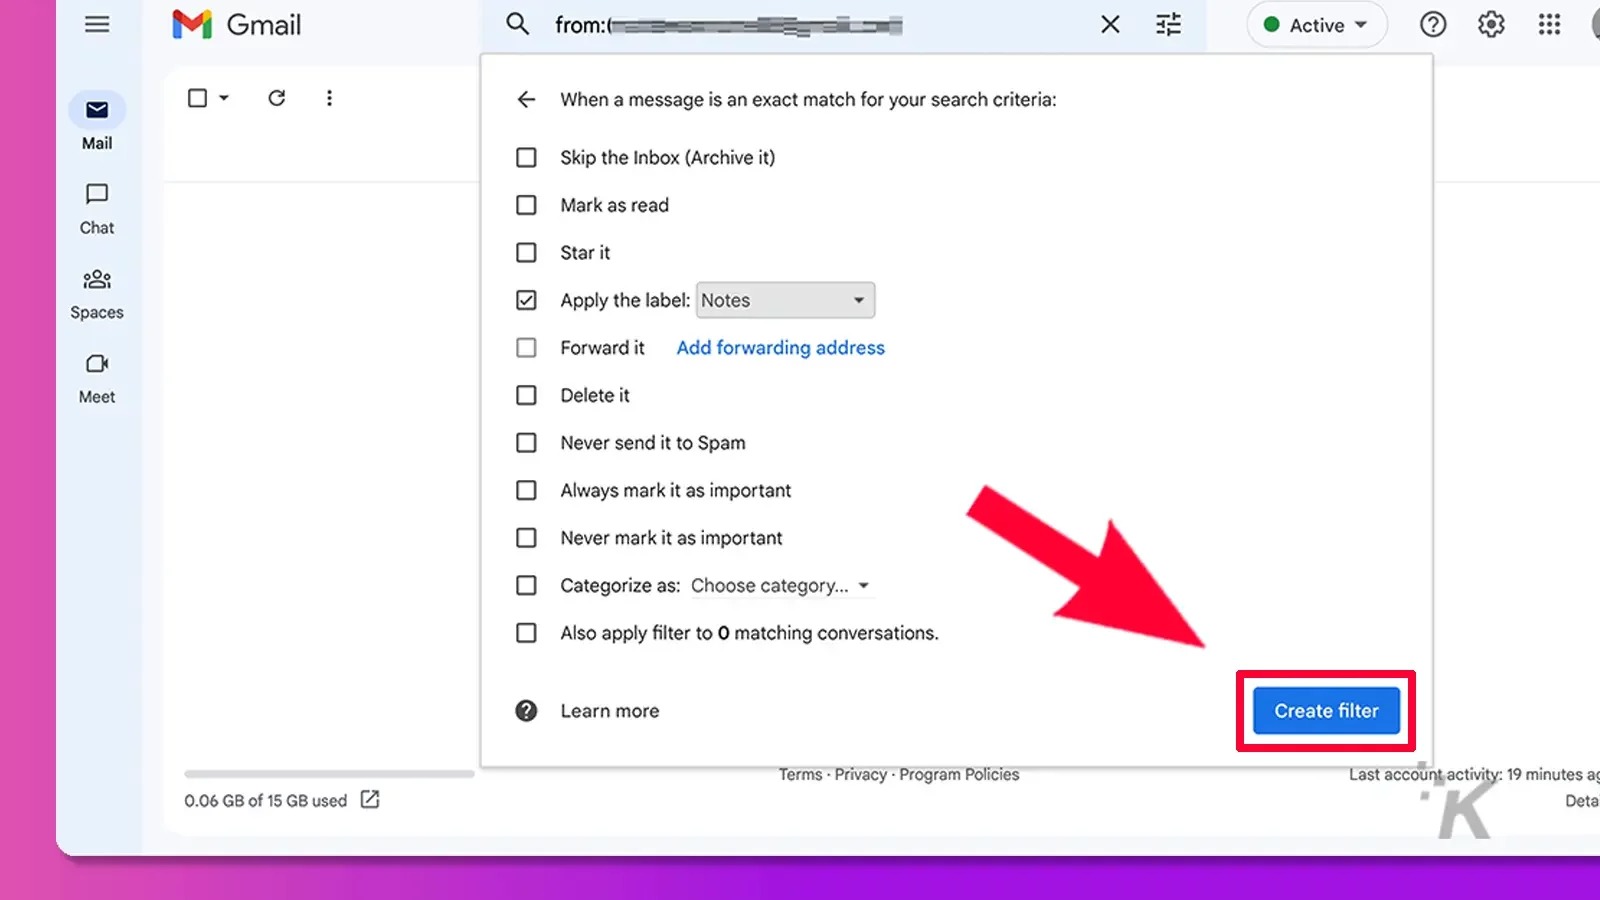
You can edit or delete your filters by going to Settings → See all settings → Filters and Blocked Addresses.
Benefits of organizing Gmail
Call them labels, folders, or something else entirely—anything that brings order to an over-stuffed inbox is worth exploring.
As they say, an uncluttered inbox leads to an uncluttered mind. If they don’t actually say that, they should start now. Because only by organizing your Gmail inbox can you know true inner peace.
Have any thoughts on this? Carry the discussion over to our Twitter or Facebook.
Editors’ Recommendations:
- How to customize Gmail’s side panels
- How to disable Gmail offline mode and clear the cache
- How to disable Gmail offline mode and clear the cache
- How to change your Gmail password and reasons you should


#GameTechie
Can the PlayStation 5 play DVDs?